how to fix a misaligned door
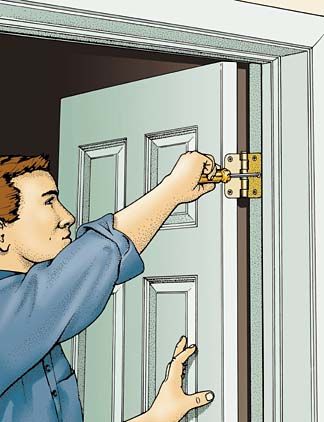
Those of us who live in older homes are familiar with doors that don't open or shut properly. Like most things mechanical, doors can develop problems. Fortunately, fixing a problem door doesn't require years of experience or special training. In fact, a homeowner can handle most jobs with just a few simple hand tools and a bit of patience.
Although many problems are obviously the result of ordinary wear and tear, some seem to appear on their own. For example, doors can be affected by the settling of a house—a common occurrence over time. The causes can be many, but the most likely are an improperly prepared foundation or drying and shrinking framing lumber. In some situations, settling can be caused by floor joists sagging under the load of a roomful of furniture.
Sticky Fixes
One of the most common signs of structural settling is doors that stick when they are closed. Most often, the problem is seen in a door that has started to rub against the top of the head jamb. You might notice that the paint on the jamb is beginning to wear at a particular spot.
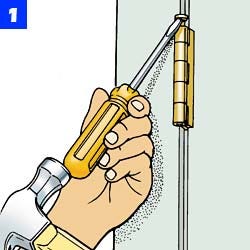
Since rebuilding the doorjambs to make them square is a major undertaking, the most straightforward approach is to trim the door to fit the opening. Begin by marking the spot on the door where it is sticking. Next, remove the pins on the door hinge to free the door. You may have to use an old screwdriver and hammer to drive out the pins (Fig. 1).
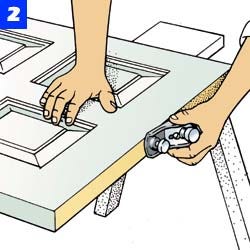
Remove the door and lay it flat on a pair of sawhorses or a worktable. Then, use a sharp block plane to trim the door in the area that you marked (Fig. 2). To prevent splitting the wood at the door edges, be sure to plane in from each edge toward the center. Don't remove too much material at first. Hang the door and test its operation. Repeat the procedure if necessary until the door operates without binding. Once it shuts properly, prime and paint the trimmed surface to seal it against moisture.
Sloppy Hinges
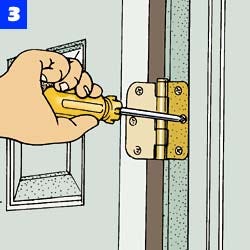
Heavily used doors often have problems at the hinges. If you have a door that rubs against the jamb on its lock edge, a loose hinge is the most probable cause. To fix it, first try tightening the hinge screws (Fig. 3). Select the proper-sized screwdriver to avoid stripping the slot in the screwhead, then firmly tighten the screws in both the jamb and door.
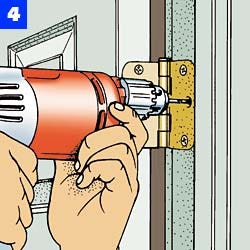
If the hinges have been loose for some time, or if you've tightened them several times already and the problem persists, it is likely that the screwholes have become worn or stripped. In this case, replace the original screws with ones that are about 1 in. longer and of the same number size. First, remove the existing screws and bore small-diameter pilot holes for the new screws directly through the old holes (Fig. 4). Then, install the longer screws.
Doorstop Repair
Occasionally, a door will develop problems with the stop—especially the stop on the latch edge of the door. If this is the case, you'll notice a gap between the face of the door and the stop when the door is fully closed and the latch is engaged.
In some instances, the stop can prevent the latch from working. Most likely, the cause is a door that has warped. While a properly constructed door shouldn't warp excessively, most doors warp a little over time. Environments that allow for different temperature and humidity conditions on opposite sides of the door are the usual causes. Bathroom, basement and garage doors are prime examples. Also, different finishes applied to opposite faces of a door can invite warping.
Attempting to flatten a warped door is a difficult, and often impossible, job. You can, however, adjust the stops on the frame to accommodate the warp in the door. Provided the problem isn't severe, this is the simplest solution.
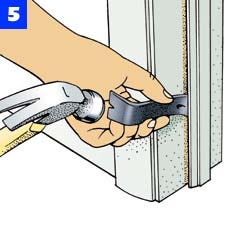
Since the door is fixed against the hinge jamb, any problems with the stops usually occur on the opposite side. Use a small, flat pry bar to loosen the stop on that side. Begin at the bottom end and gradually work your way to the top (Fig. 5).
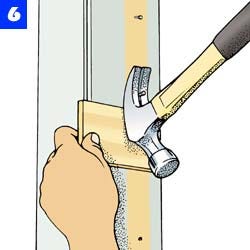
Next, look for any nails that may remain in the jamb, and pull them out with a claw hammer. Use a small shim or wood pad under the hammer head so you don't damage the jamb surface (Fig. 6).
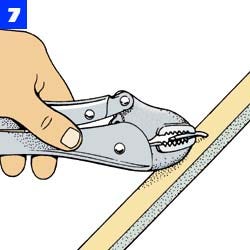
If there are nails in the stop after it has been removed, use locking pliers to pull them out from the back side of the piece (Fig. 7). Do not drive the nails out with a hammer, as this may cause splintering. After pulling the nails through, you'll be left with small, clean holes that are easy to fill.
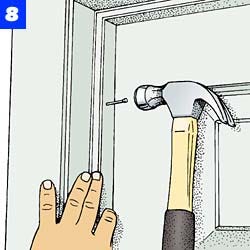
Close the door, allowing the latch to fully engage the strike plate. Examine the joint between the door and head stop to make sure there's no gap. If a large gap exists, or if there is a problem getting the door to latch properly, remove the head stop also.With the door latched, hold the stop that you removed earlier in place with its edge tightly against the face of the door. Nail the stop in this position using 3d finishing nails (Fig. 8). Then install the head stop if you removed it. Set the nailheads and fill all of the nail holes.
Latch Work
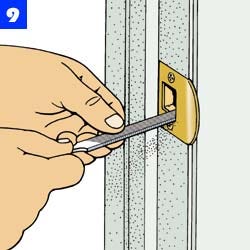
Occasionally, when a doorframe settles, the lock can no longer engage the strike plate in the jamb. Since the strike plate is normally mortised into the jamb, moving it isn't recommended. Instead, use a small mill file to enlarge the hole in the plate so that the latch can once again extend fully when the door closes (Fig. 9). In most cases, the hole in the jamb will be big enough to accommodate the enlarged hole in the strike plate. If it isn't, simply remove the plate and widen the hole with a sharp chisel.
Sometimes, the only thing wrong with a door is a broken or defective latchset. Replacing a lock isn't that difficult, especially if you can find a model similar to the existing one. If there is no model number or manufacturer's name on the hardware, bring the old latchset to a hardware store or locksmith to find a replacement.
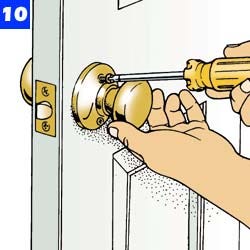
To replace an old latchset, first remove the screws that hold the knobs to the door (Fig. 10). In most cases, the screws are clearly visible on the inside rose of the lock. The rose is the circular plate that sits against the door face under the knob.
If you don't see any screws, you'll have to remove the inner knob and rose to gain access to them. First, depress the small release clip on the knob stem and pull the knob away from the door. Then, depress the clip on the rose and gently pry it away from the door. The screws will now be visible.
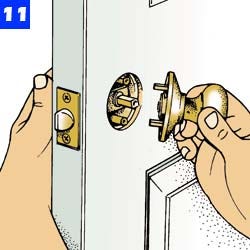
Pull the inner and outer halves of the latchset apart to remove them from the door (Fig. 11).
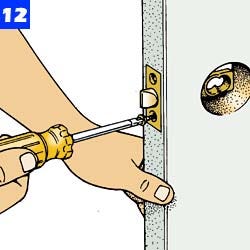
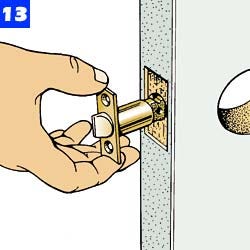
Next, remove the screws that hold the latch to the door (Fig. 12), and pull the latch out of the door (Fig. 13). If the latch fits tightly in its mortise, you may have to lightly pry it from the end that's visible through the knob hole. To install the new lock, simply reverse the removal procedure.
When diagnosing door problems, keep in mind that several conditions can exist at the same time. For example, a door that binds can stress the hinge screws and lead to loose hinges. Spend some time studying the door, looking closely as you open and close it, to locate the source of the problem. If in doubt, try the most conservative approach first.
This content is created and maintained by a third party, and imported onto this page to help users provide their email addresses. You may be able to find more information about this and similar content at piano.io
how to fix a misaligned door
Source: https://www.popularmechanics.com/home/interior-projects/how-to/a162/1275846/
Posted by: hunterturninaing.blogspot.com

0 Response to "how to fix a misaligned door"
Post a Comment